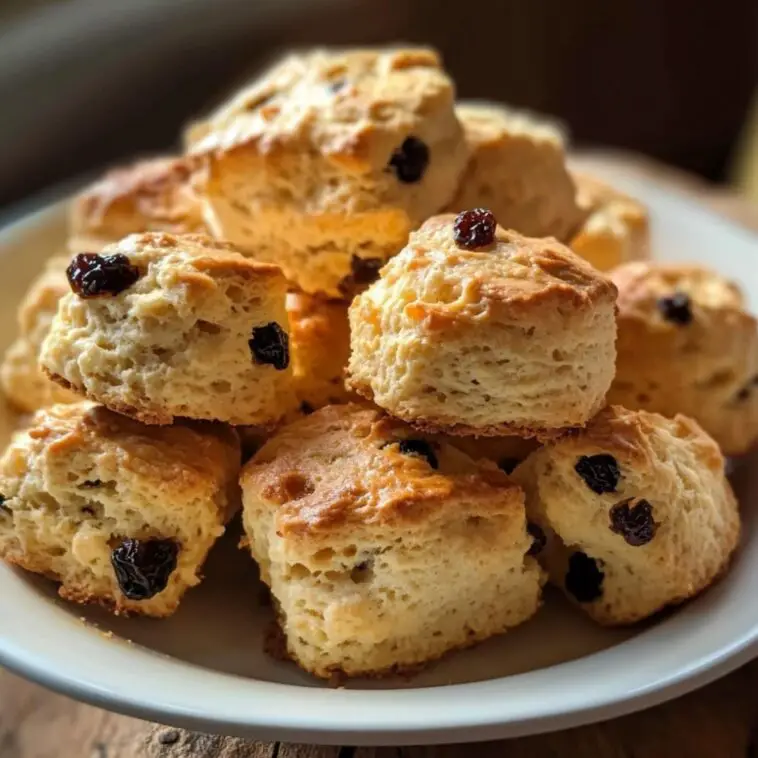
Scones are the perfect combination of buttery, flaky, and sweet. Whether you’re planning a cozy tea party or just craving a little indulgence with your morning coffee, these scones will become your go-to recipe. I’m so excited to share this easy and foolproof recipe with you. Trust me, these scones bake up beautifully every single time, and the hint of sweetness from the raisins adds just the right amount of charm. Let’s get started!
Ingredients You’ll Need
All-Purpose Flour – 2 ½ cups
The base of any good scone! Use unbleached flour for a more natural flavor. Sift the flour to make sure your scones are extra light and fluffy.
Sugar – 3 tablespoons
A touch of sweetness to balance the buttery goodness. You can use granulated sugar or experiment with a natural alternative like cane sugar.
Baking Powder – 1 tablespoon
This gives the scones their delightful rise. Make sure your baking powder is fresh for the best results.
Salt – ½ teaspoon
A little salt enhances the flavor of the scones and balances the sweetness.
Unsalted Butter – ½ cup (cold, cubed)
Cold butter is key! It creates the flaky layers we all love. Pro tip: Freeze your butter for a few minutes before cutting it into the flour.
Milk – ¾ cup
Milk binds the ingredients and gives the scones their soft, tender texture. Whole milk works best, but feel free to substitute with a plant-based option if needed.
Egg – 1 large
The egg adds richness to the dough. Beat it slightly before adding to the mix.
Raisins – ½ cup
For a pop of sweetness and texture. You can swap these out for other dried fruits or leave them out entirely if you prefer.
How to Make the Best Scones
Step 1: Preheat and Prep
Preheat your oven to 400°F (200°C) and line a baking sheet with parchment paper or a silicone mat. This ensures even baking and prevents sticking.
Step 2: Mix the Dry Ingredients
In a large mixing bowl, whisk together the flour, sugar, baking powder, and salt. This evenly distributes the ingredients and creates a light, fluffy base.
Step 3: Cut in the Butter
Add the cold, cubed butter to the dry ingredients. Use a pastry cutter or your fingers to work the butter into the flour until the mixture resembles coarse crumbs. The tiny butter bits are what make the scones flaky.
Step 4: Combine Wet Ingredients
In a separate bowl, whisk together the milk and egg. Slowly pour this mixture into the dry ingredients, stirring gently until a dough begins to form. Be careful not to overmix—stop as soon as it comes together.
Step 5: Add Raisins and Shape the Dough
Fold in the raisins, then turn the dough out onto a floured surface. Gently pat it into a 1-inch-thick circle or rectangle. Use a biscuit cutter or a sharp knife to cut the dough into rounds or wedges.
Step 6: Bake to Golden Perfection
Place the scones on your prepared baking sheet, leaving a bit of space between each one. Brush the tops with a little milk for a golden finish. Bake for 12–15 minutes or until the tops are golden brown.
Step 7: Cool and Enjoy
Let the scones cool on a wire rack for a few minutes before serving. Enjoy them warm with butter, clotted cream, or jam.
Equipment You’ll Need
- Mixing bowls
- Whisk
- Pastry cutter or fork
- Rolling pin (optional)
- Biscuit cutter or knife
- Baking sheet
- Parchment paper or silicone baking mat
Frequently Asked Questions
Can I make scones ahead of time?
Yes! You can prepare the dough, cut it into shapes, and freeze it. When you’re ready to bake, just pop the frozen scones in the oven and bake for an extra 2–3 minutes.
Can I use a different dried fruit instead of raisins?
Absolutely! Dried cranberries, cherries, or chopped apricots work wonderfully in this recipe.
What if I don’t have a pastry cutter?
No problem! You can use two knives or even your hands to cut the butter into the flour. Just make sure the butter stays cold.
How do I store leftover scones?
Store leftover scones in an airtight container at room temperature for up to 2 days. You can also freeze them for longer storage—just reheat in the oven before serving.
Can I make these scones gluten-free?
Yes, substitute the all-purpose flour with a 1:1 gluten-free baking blend. Be sure to check that your baking powder is gluten-free as well.
Why are my scones dense instead of fluffy?
Dense scones can happen if the butter melts into the flour or if the dough is overworked. Always use cold butter and mix the dough gently.
Conclusion
I hope you enjoyed making and devouring these delightful scones as much as I do! They’re simple, satisfying, and perfect for any occasion. If you loved this recipe, don’t forget to share it with your friends on Facebook using the share buttons below or save it to your Pinterest board for later. Happy baking! 😊


