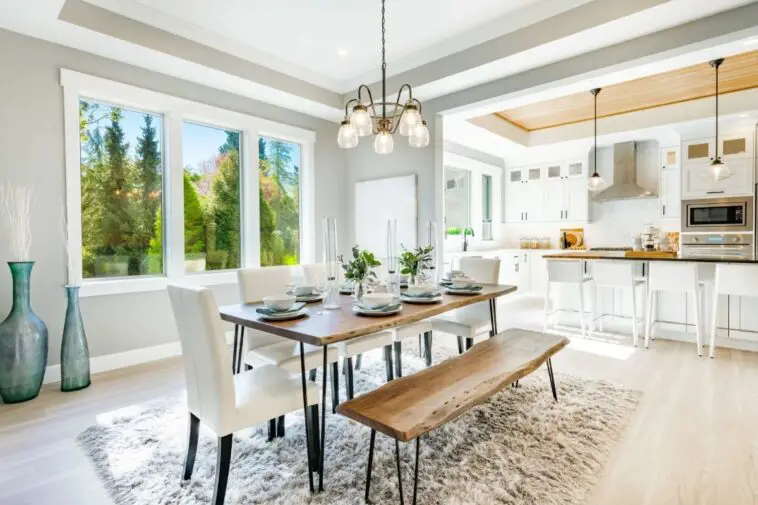
A farmhouse table brings charm and functionality to your home, becoming a centerpiece for gatherings and meals. The rustic aesthetic fits perfectly in almost any space, offering a warm and inviting feel. But these beautiful tables often come with a hefty price tag in stores. The good news? You can build your own rustic farmhouse table at a fraction of the cost!
This DIY project may sound intimidating, but it’s simpler than you think, even if you’re not a seasoned woodworker. With the right tools, materials, and a step-by-step guide, you’ll be able to create a sturdy, attractive table that fits your space and style. Plus, there’s nothing quite like the satisfaction of crafting something with your own hands.
In this guide, we’ll show you how to build a rustic farmhouse table on a budget. From gathering the materials to adding finishing touches, you’ll learn everything you need to know to bring your vision to life. Let’s dive in!
Tools and Materials You’ll Need
Tools
To start, gather the basic tools needed for this project. Many of these you may already have at home or can borrow from a friend:
- Saw: A circular saw or handsaw will work fine.
- Drill: Essential for securing pieces together.
- Measuring Tape: Accuracy is key for a balanced table.
- Sander or Sandpaper: To smooth the wood and prepare it for staining.
- Clamps: Helpful for holding wood in place as you work.
- Paintbrush or Rags: For applying stain or paint.
Materials
Stick to affordable materials without sacrificing quality:
- Pinewood or Reclaimed Wood: Affordable, durable, and perfect for the rustic look.
- Wood Screws and Nails: To secure the pieces together.
- Wood Glue: For added stability.
- Wood Stain or Paint: Choose a finish that complements your décor.
- Polyurethane Sealant: To protect the wood surface from damage.
Step 1: Designing Your Table
Start with a plan. Decide the size of your table based on your space and needs. For instance, a 6-foot-long table is ideal for seating six people comfortably. Sketch out a basic design, marking dimensions for the tabletop, legs, and supports.
Tips for Budget-Friendly Design:
- Use Reclaimed Wood: Check thrift stores, construction sites, or pallets for inexpensive wood.
- Stick to Simple Legs: Straight wooden legs are easier to build and cost less than intricate designs.
- Measure Twice, Cut Once: Double-checking saves you from costly mistakes.
Step 2: Building the Tabletop
Cutting the Wood
Cut your wood planks to the desired length for the tabletop. For a 6-foot table, you might need 6-8 planks, depending on their width. Ensure the edges are straight so they fit snugly together.
Assembling the Top
Lay the planks side by side, checking for alignment. Use wood glue along the edges before clamping them together. Once dry, secure the planks using screws or pocket holes on the underside to avoid visible hardware.
Sanding the Surface
Use a sander or sandpaper to smooth the tabletop. Focus on edges and corners to prevent splinters. A smooth surface also ensures an even finish when staining.
Step 3: Crafting the Legs and Supports
Building the Legs
Cut four pieces of wood to your desired height, typically around 29-30 inches for a standard dining table. Simple square legs are easiest to make and keep costs low.
Adding Supports
For stability, add aprons—horizontal pieces of wood that connect the legs. Secure these using screws or brackets. Make sure the frame is level before attaching the tabletop.
Step 4: Finishing Touches
Staining or Painting
Choose a wood stain to enhance the natural grain or a paint color to match your décor. Apply the stain with a brush or rag, following the wood grain. Let it dry before applying a second coat if needed.
Sealing the Table
Seal your table with a polyurethane finish to protect against spills and scratches. Choose a matte or glossy finish depending on your preference. Apply evenly and let it dry thoroughly.
Step 5: Assembly and Final Touches
Attach the tabletop to the frame using screws from underneath. Double-check that everything is secure and level. If you like, add felt pads to the bottom of the legs to protect your floors.
Why Build Your Own Farmhouse Table?
Building your own table is rewarding and cost-effective. You can customize it to fit your space and style, and you’ll gain a functional, beautiful piece of furniture that will last for years. Plus, DIY projects like this are a great way to develop new skills and create something truly unique.
So, roll up your sleeves and get started! With time, effort, and this guide, you’ll soon have a rustic farmhouse table that will become the heart of your home.


